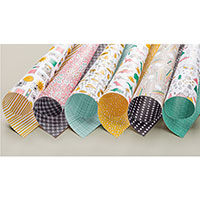
Check out the July Online Card Club from last month! The kit was jam-packed with GOODIES and FUN!
Here’s a note from one of my members:
“Hi Lorri, I get excited every month for the card club goodies.
I count down the days. I really appreciate all you do to make this card club so wonderful.”
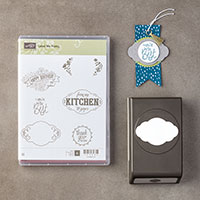
Here’s a Project Sheet to help you create the 3D item I shared!
You can take part in this each month, too! August Online Card Club deadline is August 10th. Please read more by clicking the graphic below:
If you are a member of my Online Card Club:
You will receive a packet each month that will be shipped to you!
Included in this class will be 8 cards (4 card designs, 2 each).
One stamp set or bundle will be featured.
Stamp sets are not included – you can substitute with what is in your stash OR you can add on the stamp set/bundle if you’d like!
You will receive around $20 of Stampin’ Up products that will be used to create your projects
YOU CAN RECEIVE EXTRA PERKS BY JOINING ONLINE CARD CLUB! (see below)
If you complete 6 months in a row of Online Card Club, you will receive a SURPRISE BONUS of $25 in FREE PRODUCTS, plus other goodies!
HOW DO I JOIN?
Sign up by the 10th of the month so you can get that month’s class kit
MEMBERSHIP IS A RECURRING MONTHLY PAYMENT of $38
You can join or cancel at any time
Kits will be shipped by the 25th of each month
PDF tutorials will be emailed by the 25th of each month
Once you are signed up, I will email you, asking if you would like any of the optional add-ons that I am offering with the class for that month. If you would like any of them, I will send a separate PayPal invoice for the add-ons.
I hope you consider the Online Card Club! The August Online Card Club deadline is August 10th. Please read more by clicking the graphic below:
You are going to want to grab the All Squared Away bundle because they will not be carried over into the new catalog, and are while supplies last! This sale ends in a few days! You can click HERE to see all the products on sale during the “Savings are in Bloom” promotion going on!
Here is a video of today’s project to help you if you want to recreate it.
I have also made a Project Sheet if you like to print and read that.
Here’s a video from my YouTube LIVE Channel below. Be sure to subscribe to my channel, please!
I really like clean and simple cards, and that was the look I was going for with this card.
This was the 2nd card we made at Stamp Club this month. Remember, you can get in on these completed Stamp Club projects for FREE – all you have to do is place an online order of $35 or more and use the Hostess Code (on my right side bar). You can read details HERE!
In 2 more days we leave for the Stampin’ Up Incentive Trip, which is an Alaskan cruise! Thank you to my customers AND team – that’s how I earned the trip! You mean the world to me, and I am grateful to each and every one of you!
I’m an Arizonian – and am curious what the weather will be like! This trip has been so hard to pack for! Who knows what kind of weather we will have! But I’m originally from Minnesota, so if I bring everything except the kitchen sink, I should be good! LOL
I know it’s still winter in most places, but it’s spring weather here in AZ!
Here’s a card to help you THINK SPRING!
Recipe:
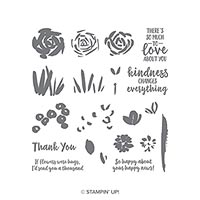
Stamp Sets: Swallowtail, Creative Elements, Lots of Thanks
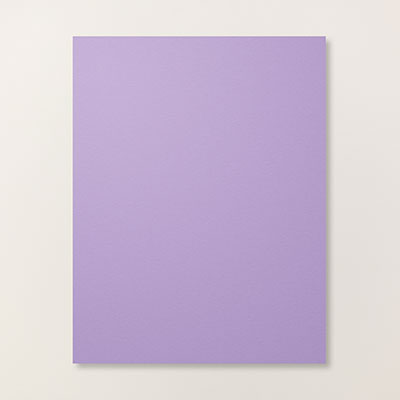
Paper: Wisteria Wonder, Pool Party, Vellum
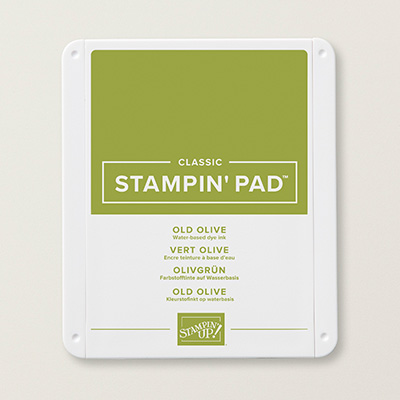
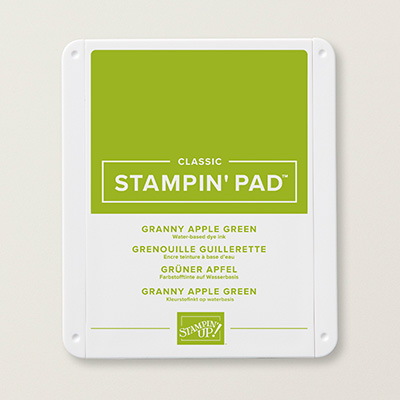
Ink: Versa Mark, Wisteria Wonder, Pool Party
Accessories: White Embossing Powder, Wisteria Wonder Ruffle Trim
Today’s the BIG DAY!! The Spring Catalog is LIVE! Click on the image above to view the new 40 page catalog, filled with exciting new products!
Here’s a card I made to give to my hair stylist. I saw the idea at our SHARE table at my team meeting. My super creative downline, Michelle Acuna, made one of these and shared it with our group.
Recipe:Stamp Set: Yippee Skippee!
Paper: Whisper White, Foil Sheets, Basic Black
Ink: Real Red, Basic Black
Accessories: Basic Black Stampin’ Writer, Large & Medium Oval Punch (Medium is retired), Word Window Punch, Silver Brad
Here’s a card we made at Stamp Club this month. It’s not too late, you can still join Stamp Club – local or virtually! Read HERE for more details.
Recipe
Stamp Set: Swallowtail, Lots of Thanks
Paper: Whisper White, Pool Party, Wisteria Wonder
Ink: Pool Party, Wisteria Wonder, Clear Versa Mark
Accessories: White Embossing Powder, Daubers
Just ink up the Swallowtail stamp with Versa Mark, then heat with white embossing powder. Use the sponge daubers and ink from ink pads to color over the embossed image. Super easy!
Whenever I have to make quantity/fast cards, I like to use simple designs! Here is a style I have used many times, and just keep changing the colors! Here’s one from the past with the same design HERE.
You may have seen my ladybug card I posted a while back, HERE. One of my customers thought it would be fun to see a BEE with this same concept, so I thought I would give it a try! Here’s the result!
Recipe:Stamp Set: Thank You KindlyInk: Craft WhitePaper: Basic Black, YoYo YellowAccessories: Large Scallop Circle Die Cut, 1 3/4″ Circle Punch, Large Oval Circle Punch (for antenna), 1/4″ Circle Punch, Black Brads
Cut out 2 black scalloped circles and one yellow one from the large die cut. One black one will be the base, the other will be the wings.
Cut the yellow one in strips, matching up the scallops ends. Tape it to the black large scallop circle.
Cut this striped one in half down the center.
Punch out a 1 ¾” circle out of black cardstock. Glue this to the back of the large black scallop bee body.
Punch an oval out of black cardstock. You can throw away the OVAL that is punched. The part you want is the part that is left on the cardstock! Just punch again about 1/8” higher than the one you just punched. Do this two times to make the antenna. Then punch a ¼” black circle for the ends of the antenna. Glue the antenna to the back of the head.
Attach the striped wings to the black scallop circle body. Attach with two black brads at the top. They will swivel to open and shut.
The content of this blog is the sole responsibility of Lorri Heiling as an independent Stampin' Up! demonstrator and the use of and content of classes, services or products offered is not endorsed by Stampin' Up!


 Supply List for Zany Zoo project: